
Here you will find information about how you can create a cold staking VPS (virtual private machine) for the Ghost network. This will allow you to stake your Ghost continuously to maximize earnings from staking rewards. This is more technical than cold staking in a pool. Consider our other guide here if this seems too difficult. If you run into any problems reach out to our helpful community on telegram.
List of topics
- VPS Provider & Setup
- Connecting to your VPS Win (PUTTY)
- Connecting to your VPS Mac/Linux (Terminal)
- Installing GhostVault on Your VPS for Cold Staking
- Connecting Ghost Wallet to your Cold staking VPS
- Update an existing Ubuntu VPS
VPS Provider & Setup
For this guide we will be using Vultr.com for the VPS (virtual private server) provider. You are welcome to use whatever you prefer but the guide will slightly deviate in that case.
- Create an account on https://www.vultr.com/
- Once logged in you should see “Products” sidebar item, click it.

3. Now you should be on the VPS listing page. Click the “+” button, on the top right, to create a new VPS that will be used to cold stake your Ghost.

4. This will take you to a new page to set the parameters for the VPS.
5. The top “Choose Server” selection should be selected as “Cloud Compute”

6. Next, you will select the region for the VPS, “Server Location”. Select whatever location you prefer to have your VPS running, this doesn’t affect anything major.
7. Now to select the “Server Type”, this is important. Make sure the “64 bit OS” is selected in the top tab selection:

9. A small dropdown box will appear and select “20.04 x64”.
10. The next section is to select the “Server Size”. Minimum requirement is the $5/month sever:
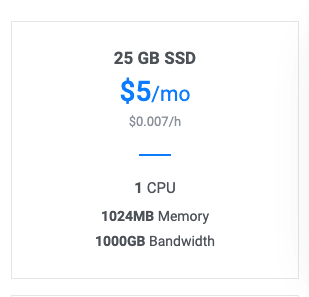
11. You can skip the “Additional Features”, “Startup Script”, and “SSH Keys” sections.
12. Go to the bottom where it has “Server Hostname & Label”. For this enter “ghost-coldstaking-node”:

13. Now you can click “Deploy Now”, the blue button, at the bottom right of the screen.

14. It will now take you back to the VPS list view page. Give the server about 2–3 minutes to be created. It will show “Installing” under the status column, wait for this to finish:

15. Once it is done the status text will change to “Running” and the color will be green.
16. Click on the title of the server on the list to load it’s page up, “ghost-coldstaking-node”.
17. Leave this page open and we will come back to it in a moment.
Connecting to your VPS
The next part of this guide we will be connecting to the VPS we created in the previous section. This will vary slightly if you are on Windows, Mac, or Linux machine.
Windows Users Only (PUTTY)
(Mac Users Guide is further down the page)
- For windows you will need to download an application called PUTTY if you do not already have it.
- You can find the download link to the application here, https://www.chiark.greenend.org.uk/~sgtatham/putty/latest.html
- Find the download link under “Alternative binary files”:
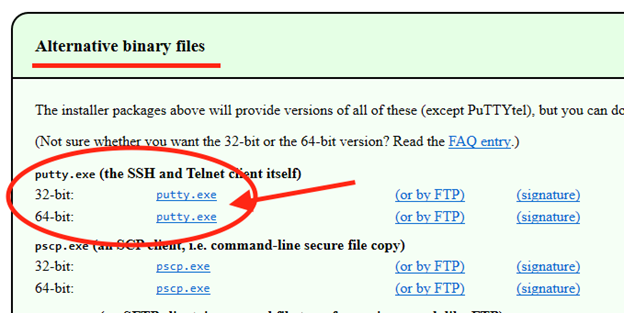
Select either the 32-bit or 64-bit version depending on your system (most users will be 64-bit)
4. Save or Run the exe once it downloads and you will see the PuTTY Configuration screen.
5. Now we need to find the IP Address of our VPS server from Vultr. You can find the IP Address of your server from Vultr.com website as shown, which you simply click the copy button (red arrow pointing to it)
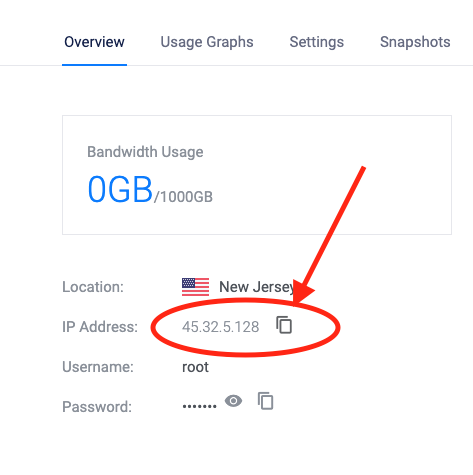
6. Now place your server IP in the Host Name box
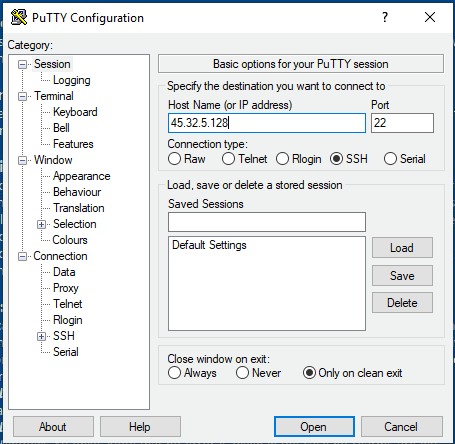
7. Click “Open”
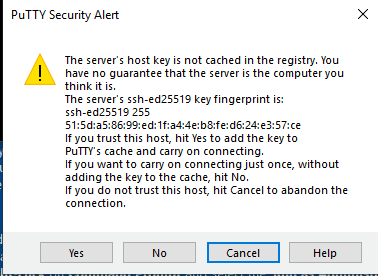
8. A popup will appear like this, click “Yes”
9. Now you should see a black screen that says “login as:”.
10. Type “root” (without the quotes) and press enter

11. It will now ask for a password. We can find this on the Vultr website,simply click the copy button (red arrow pointing to it) to copy the password.
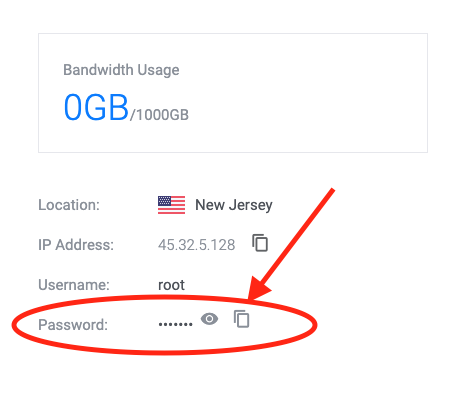
12. Now in PuTTY to PASTE your password in all you have to do is RIGHT CLICK ONCE. Your password will not show on the screen and it will look like nothing was entered or happened, this is normal, your password text does not appear. Press enter and you should see text that looks similar to this and you are logged in
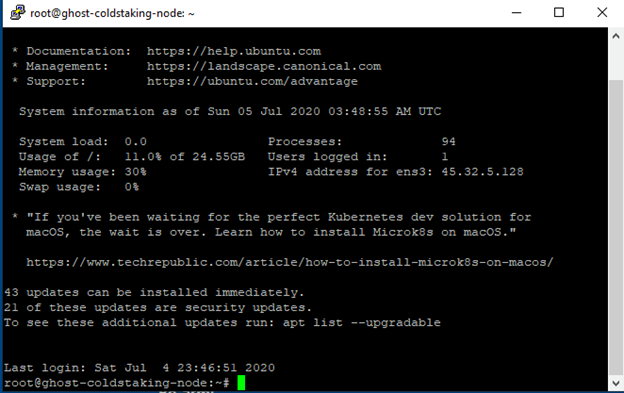
13. Now proceed to the next section, “Installing ‘GhostVault’ on Your VPS for Coldstaking”
Mac / Linux Users Only (Terminal)
Mac and Linux machines already have command line interfaces built in. For mac, press Command+Space which will show the search window, then type in “terminal” and open the Terminal app.
- To log into your VPS you will need to use this command:
ssh root@IP_ADDRESS - In the place of the IP_ADDRESS you will fill this information with the IP Address of your VPS machine from Vultr.com.
- The IP Address will be shown here, just click the copy icon (red arrow is pointing at)
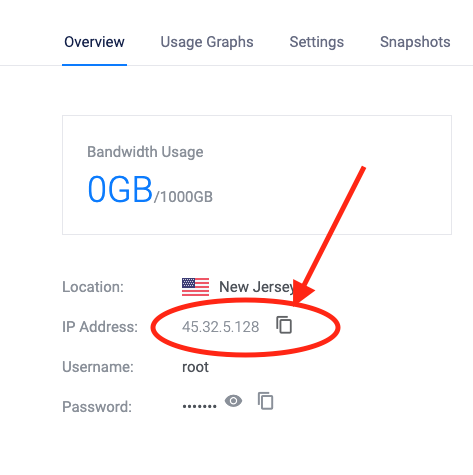
5. So in this case the command I need to type in will look like this…

ssh root@45.32.5.128
6. Next it may or may not ask you to type either ‘yes’ or ‘no’, “Are you sure you want to continue connecting (yes/no)? “ -> type yes
7. At this point it will be asking you for the password. This is listed on the VPS machine from Vultr.com.
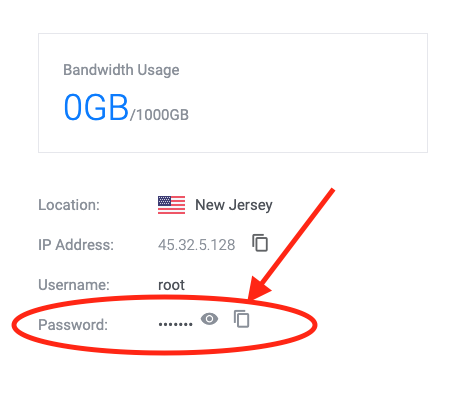
The same as before we will just click the copy button (red arrow is pointing to)
8. Now your password will be copied to your clipboard.
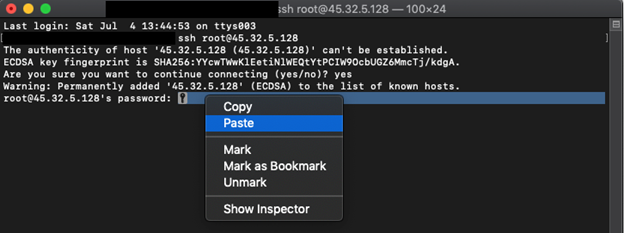
9. We go back to Terminal, right click inside this window somewhere to bring up the menu. Click “paste”, to paste in your copied password:
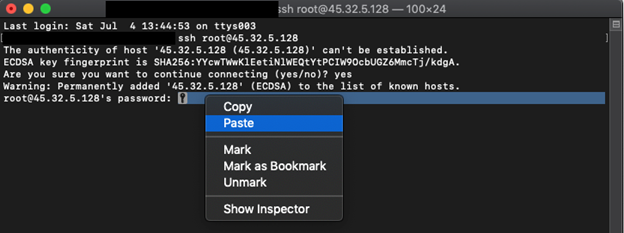
10. Whenever you click paste, TEXT WILL NOT APPEAR (your password will not show up), but your password will be pasted in even though it doesn’t show anything. Now all you have to do is press enter and you will be connected to your VPS via command line.
11. Now proceed to the next section, “Installing ‘GhostVault’ on Your VPS for Coldstaking”
Installing “GhostVault” on Your VPS for Cold Staking
Now we will continue the guide and set up a Ghost node via your VPS that will be able to cold stake your coins without you having to keep your wallet open all the time.
- To begin from here you must make sure you are logged into your VPS. You command line window should similar to this:
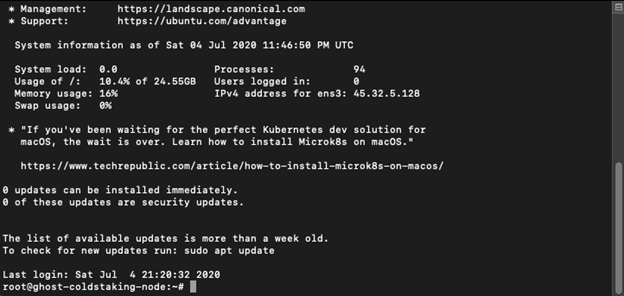
If this is not what you see then you are not logged into your VPS and please go back to the previous section “Connecting to your VPS”.
2. Creating a regular user account:
For security reasons, GhostVault should never be ran as the root user.
In order to create a user account, type the following:
adduser <user_name>replace the <user_name> with the username of your choice. In this example I am using joe

Now enter a password. It will look like you are not typing, but you are.
After that, re-enter the password to confirm.

Next press ENTER 6 times to finalize making a new user.
Next, type the following to add your new user to the sudo group.
usermod -aG sudo <user_name>Replace <user_name> with the user your created.
Now log out by typing exit
log back in to the VPS, but replacing root with the user you created, and use the password for the new user.

Once you log back in, you should see your user instead of root.
Log in with this user for now on.
See https://github.com/ghost-coin/GhostVault/blob/main/docs/VPSsetup.MD
for details on how to secure your VPS further.
3. Now once you verify you are on the VPS we can start by getting the VPS ready for GhostVault installation:
sudo apt update && sudo apt upgrade -y && sudo apt install python3-pip gitOnce that has finished, we need to download GhostVault and finish the dependency installation.
cd && git clone https://github.com/ghost-coin/GhostVault && cd GhostVault/ && pip3 install -r requirements.txtYour VPS is now ready for GhostVault setup.
To copy and paste, is similar to how we have done with the password. Right click the window, and “Paste” for Terminal or simply right click for PUTTY, then press Enter.
4. To begin the GhostVault setup process, type the following:
python3 ghostVault.py quickstart5. To begin, press: Enter

6. Next, GhostVault will download ghostd and sync with the Ghost network.

The sync process may take more than 2 hours, depending on network speed and hardware.
For most users, this should take less than an hour.
7. Create new wallet

On this screen, press ENTER to continue to make a new wallet.

Now enter a name for your wallet. this can be anything you like. Then press ENTER

On the next screen, copy and save for your records the words in green. This words need to
be spelled exactly the same and in the same order.
Once you have the words safely stored, press ENTER
8. Next a new extended public key will be created:
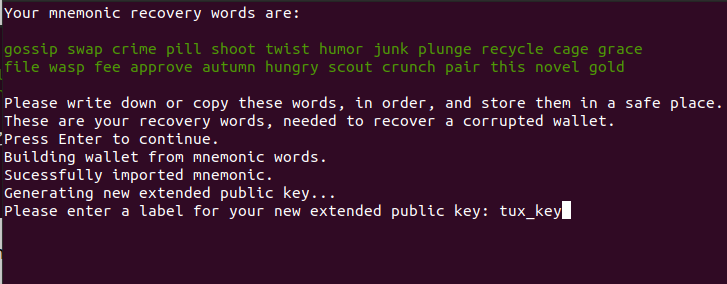
Enter a name for the key. This can be anything that you like. Once entered press ENTER

Your extended key will be shown to you in green. Copy this key down, you will need it later.
Press ENTER to continue
9. Enter the reward address:
The reward address is where staking rewards are sent. You should have control over this wallet. You can use either a standard or a stealth address for this.
For normal privacy mode use a standard address. In this mode, all staking rewards are paid directly to public address In a public transaction. This will pay to the same address every time.
For Enhanced Privacy mode use a stealth address. In this mode all staking rewards are paid directly to your wallet on a public transaction, just like in normal mode. But, the payments will be paid to freshly generated address derived from your stealth address. This will make it extremely difficult for any prying eyes to associate any payments to you.
For this demonstration, I will use a stealth address.

Press ENTER to continue

Then press ENTER again to confirm.
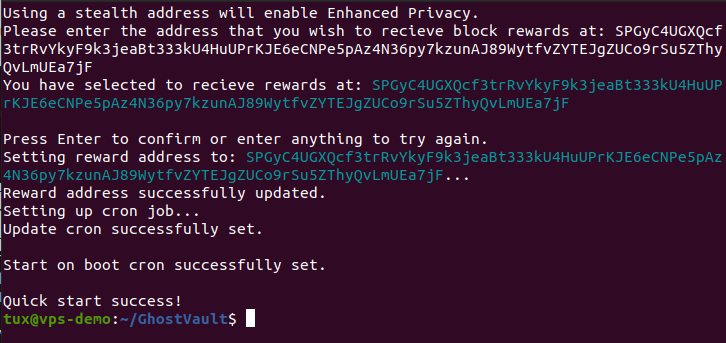
This concludes the basic GhostVault setup. Continue to next step to activate ANON mode, or
continue to ‘Connecting Ghost Wallet to your Cold staking VPS‘
10. Activating ANON mode (optional):
To activate ANON mode, start by typing the following.
python3 ghostVault.py private
Type in private to continue with ANON mode activation
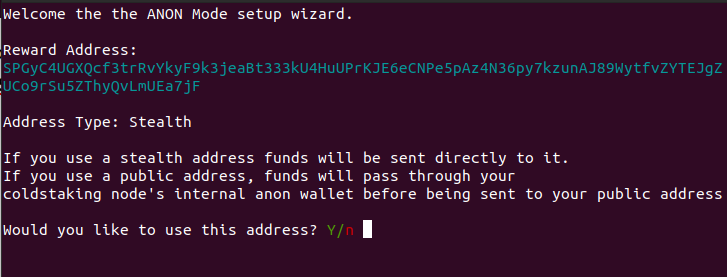
To use your current reward address for anon payments, type: y

That is it, ANON mode is active. Continue to the next section to connect wallet to VPS
Connecting Ghost Wallet to your Cold staking VPS
Now we will finalize the install process and link your Ghost wallet to your newly created coldstaking VPS node. For this you will need your cold staking public key, which was covered in the last section.
- Now open your Ghost wallet and using the left sidebar make sure you are on the wallet you want to set up cold staking for.
- From the overview page you will click the “+” icon on the cold staking widget
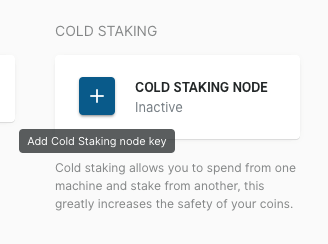
3. This will open a new window…
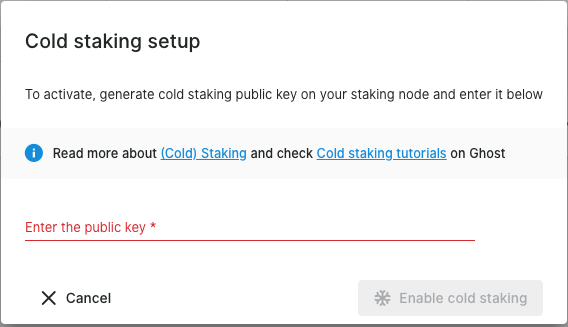
4. This is where you will paste in the public key from the previous section “Installing GhostVault on your VPS for cold staking” step 8, it starts with “PGHST”.
5. Paste in the key and click the blue button, “Enable cold staking”.
6. At the bottom of the wallet you should see a notification that says

7. (Possible Bug!) You do not need to enter your key again and after you see the notification text the cold staking widget may still say “Inactive” like this,
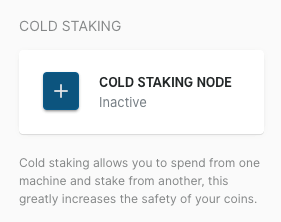
However if you look at the top status bar there will be a snowflake icon that should now be blue and say “Cold staking active”
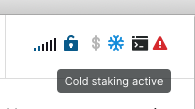
8. To fix this UI issue close your wallet and reopen it….
9. Now once you restart the wallet your cold staking node status should now look like this
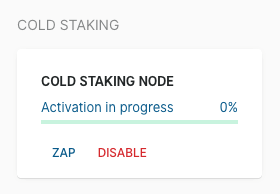
10. The activation time could take a decent amount of time. It is recommended to just wait.
11. However to skip the activation you can use the “ZAP” button (shown above)
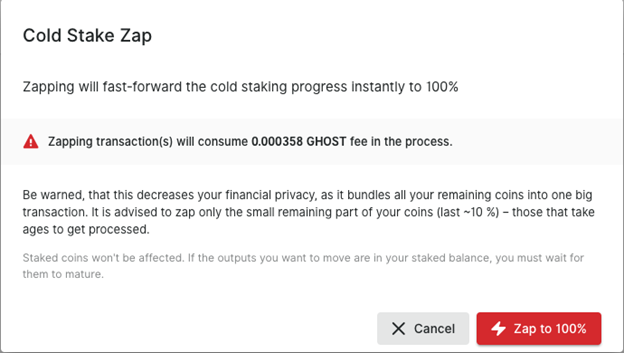
12. This will create a new transaction and your coins will have to re-mature again (255 confirmations) that will take about ~7 hours but activation will be at 100% and you will only have to do this once.
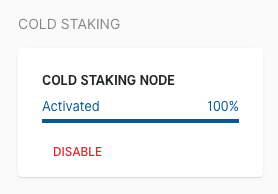
13. Once everything is complete the cold staking status will now be at 100% and you wallet and the VPS are connected.
Finished
Update an existing Ubuntu VPS
You do not need to keep your Ghost wallet open anymore to hot stake. The VPS will stake your coins for you now 24/7 so you can consistently earn staking rewards.
If you did not close the PUTTY window or Terminal window from earlier it is safe to close this, the VPS will continue running.
Your GhostVault node will update itself and ghostd as needed.
If you find ghostd to be out of date, you can run the following to check for and
apply any available update for both GhostVault and for ghostd
cd ~/GhostVault && python3 ghostVault.py update